Episode #02 [01-1983]
"Shelton's Kjort Endeavour"
Note: The "Stone Oakvalley's Moment In Time" project deals with 10 episodes, I just randomly chosen Episode 2 as my first focus.
03 Dec 2022:
The time since 10 April 2022 was used to further develop other episodes which also required quite a bit of learning, testing, research and development in related areas to the entire VR experience. No more code or 3d objects have been done since April 2022 on this particular episode. But, today I released the official banner/splash screen graphics for the title and the setting of which this game will take place in. See title graphics further down the gallery.
It has been almost 1 year since this particular Episode started development, time really flies!
10 April 2022:
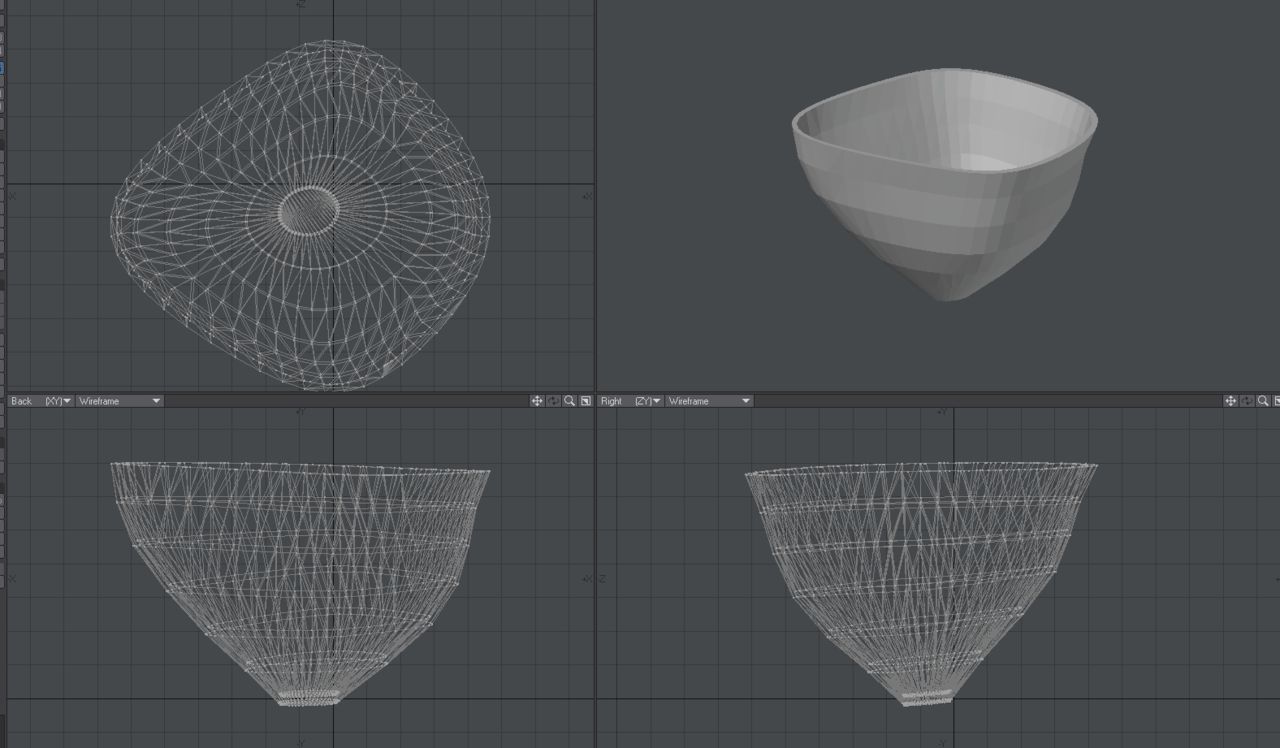
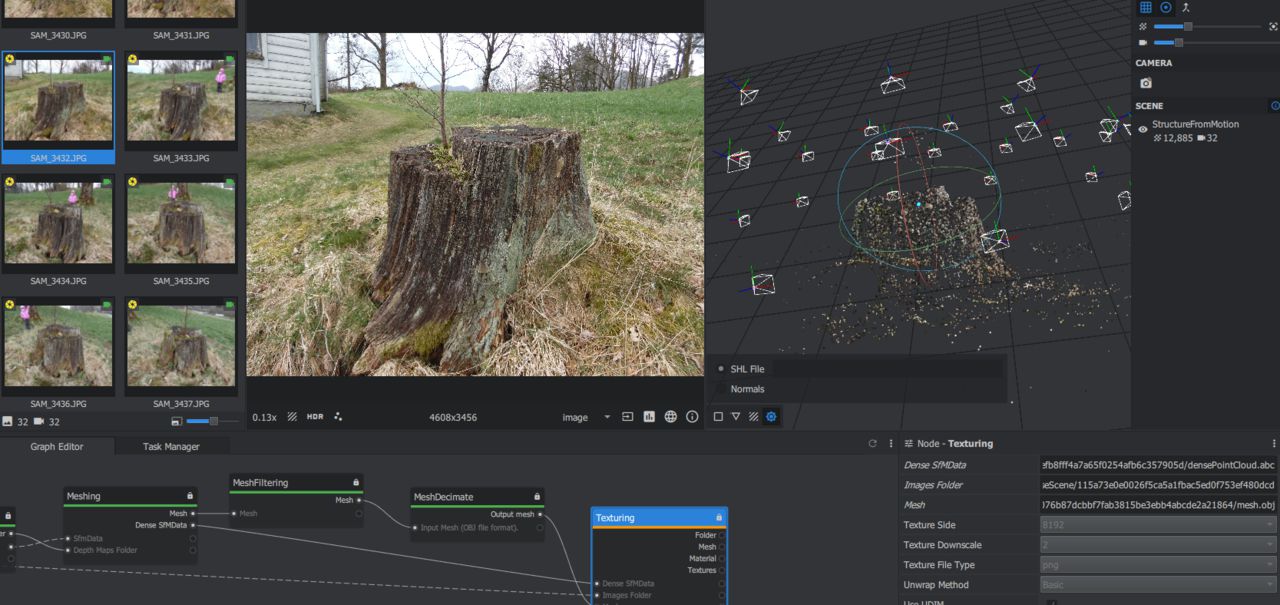
The days since last update were actually spent on working on other Episodes as well (separate post will emerge soon), but today I spent some time trying out Meshroom in order to photogrammetry a huge old tree that was chopped off leaving only the base foot in place.
Me, my daughter and my wife were out for quick stroll in the nearby landscape. I've started bringing my camera, so that I can take photos like this as well as nature photos that are to be used in my VR projects for the next years ahead, nothing better than your own textures, a lot out there on internet is either PLAIN SHIT made by DUMB people not knowing pixels or its just an fancy pricetag on 3d models and textures that never fit your intention/project anyway.
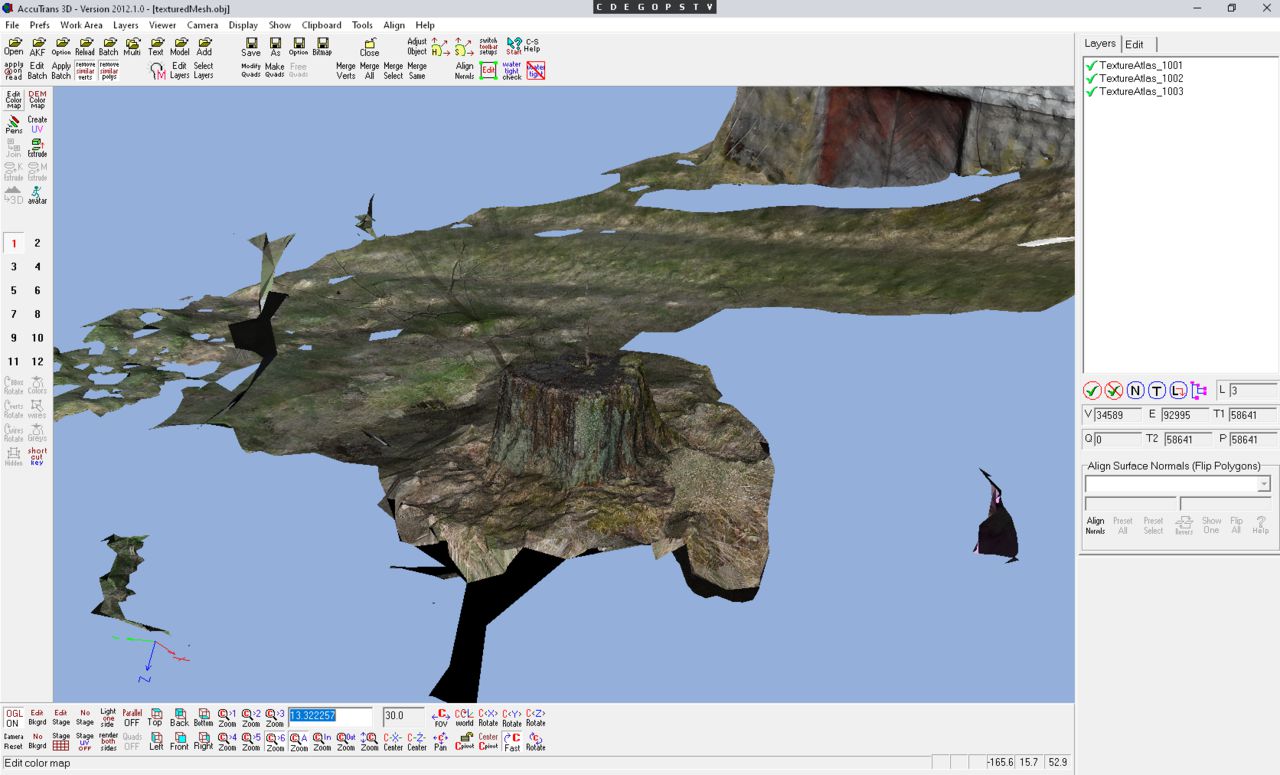
Anyway, since it was easy to walk around that tree stub, I took about 32 images and smacked it into Meshroom. After a short while a nice wooden stub came out as a 3d model, check screenshots below. This wooden treestub must be cleaned up beforing inserting into my Unity project as part of the landscape models that will appear in Episode #7. I intend to use variations in size for this object inside by level design and landscape. Probably I'll also do some color variations of the objects out of a randomized range of tinting or other tricks to break the same model apart from the others around/nearby it to ease the natural selection of things, rather to get that gnarly copy-paste feeling, we'll see how that goes in the end.
03 April 2022:
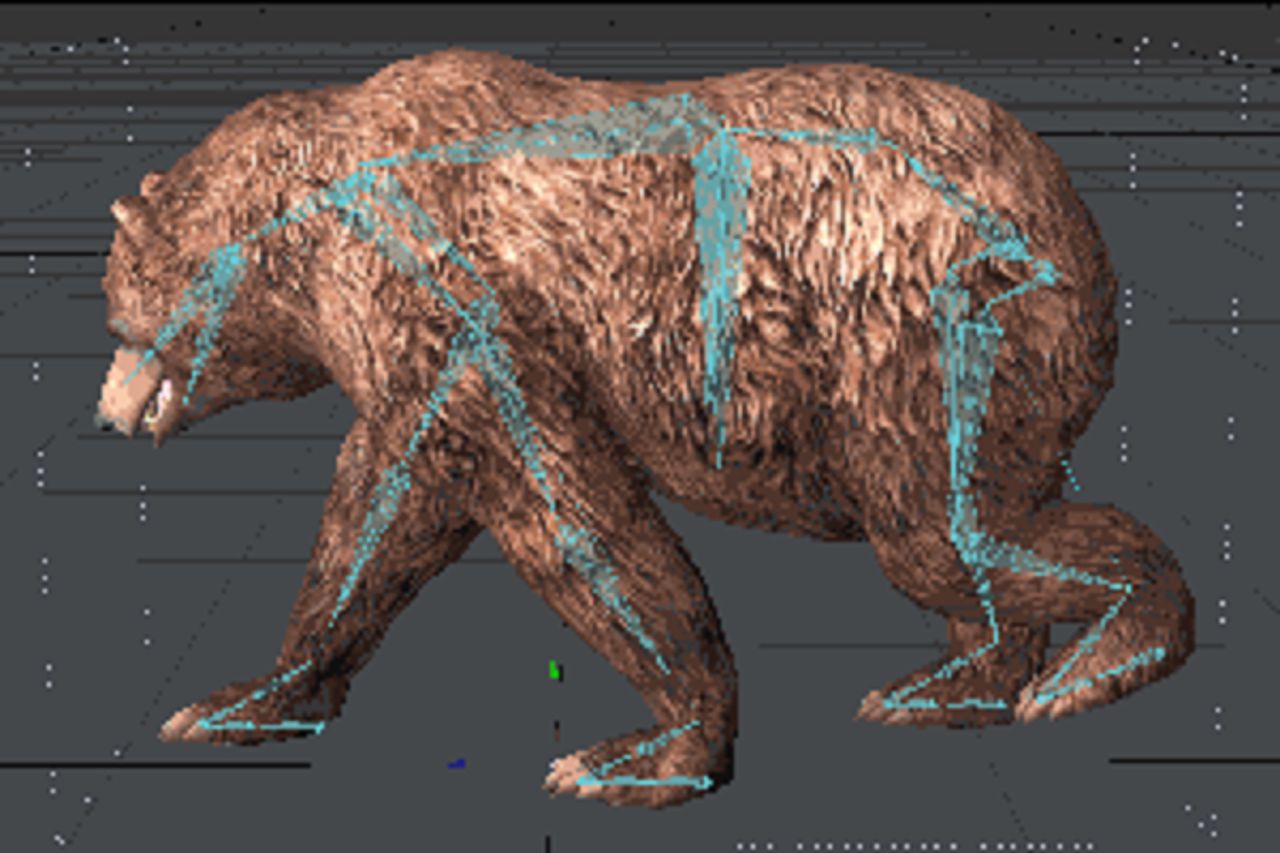
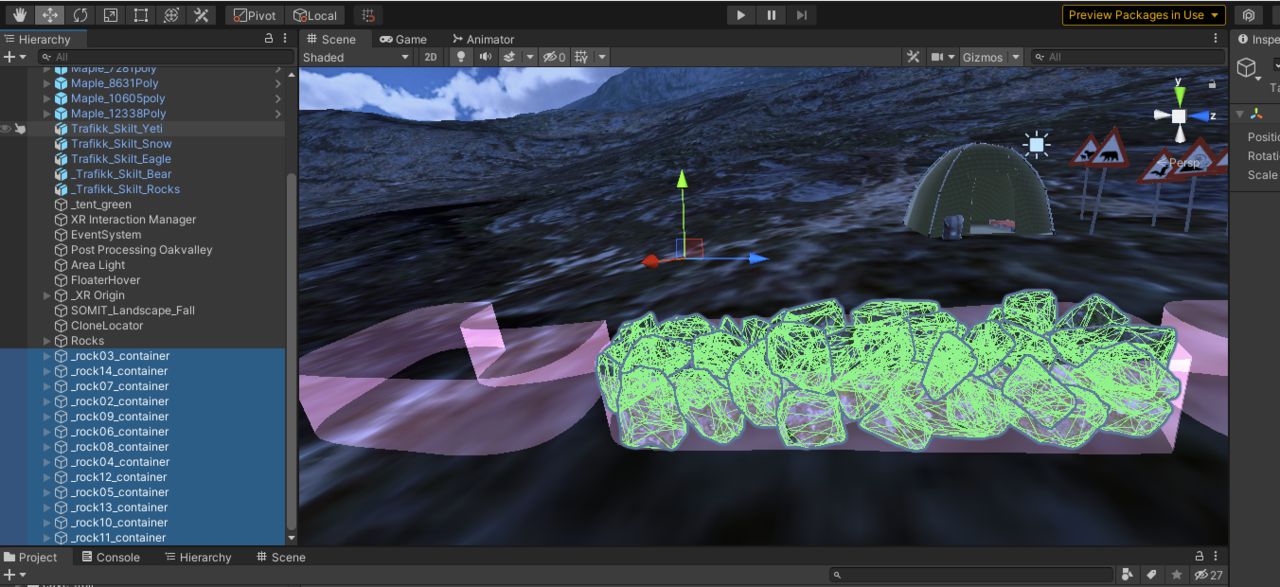
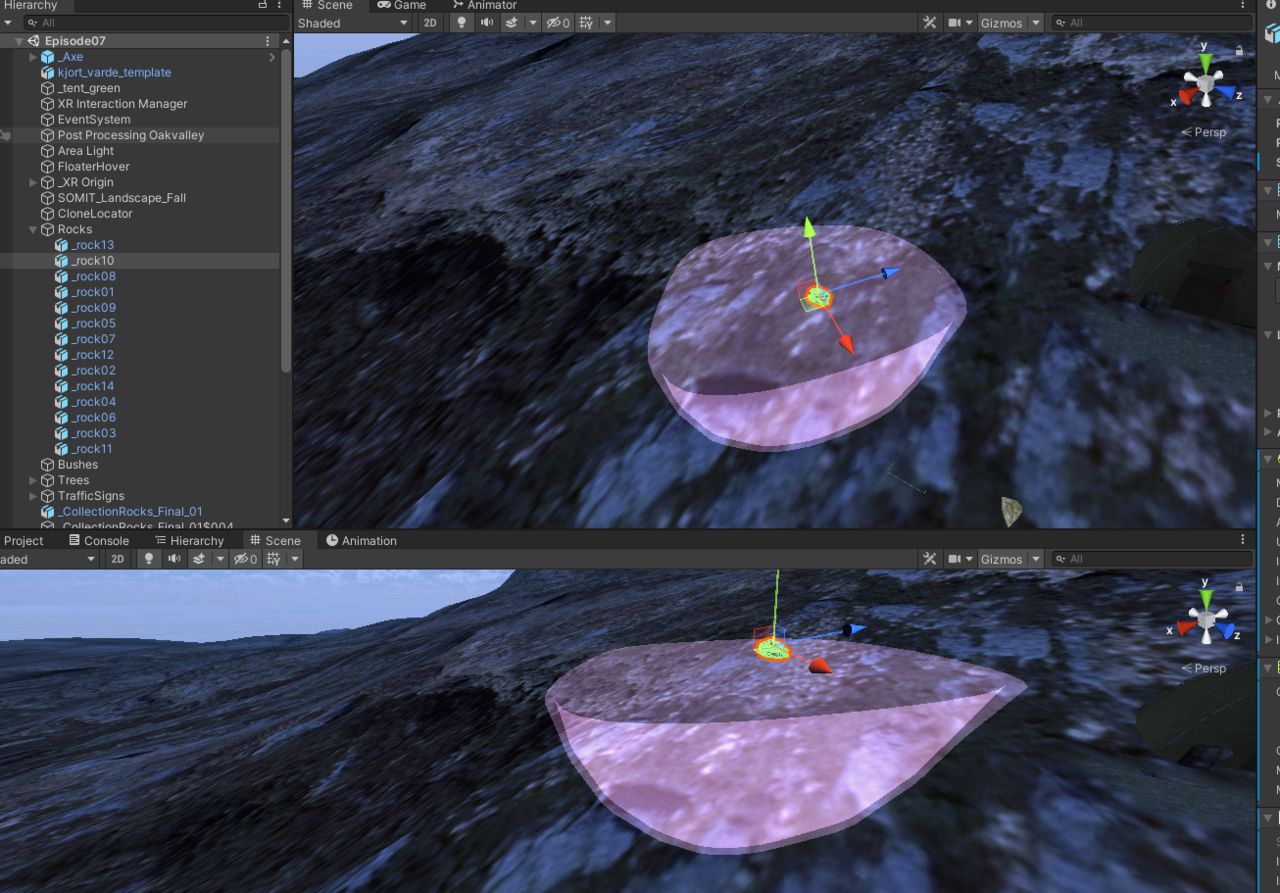
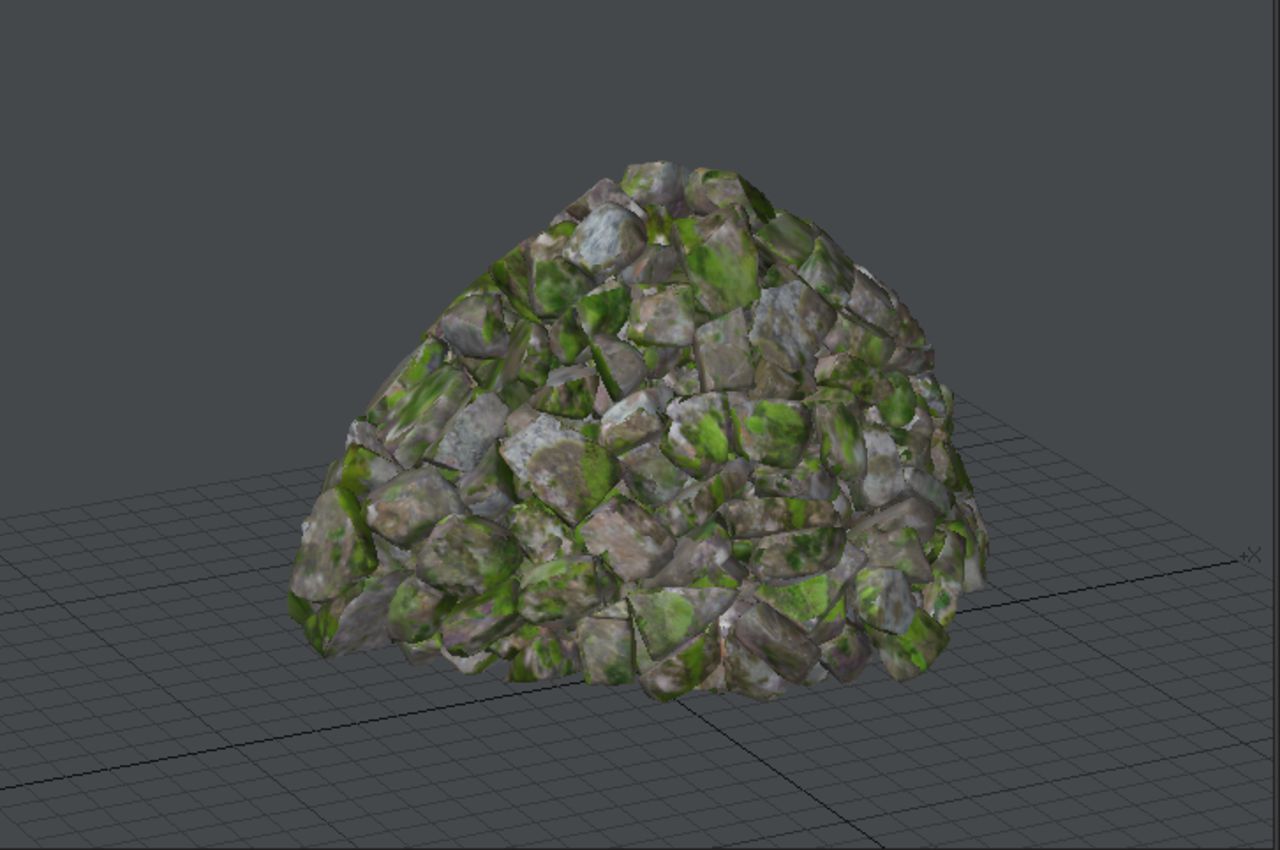
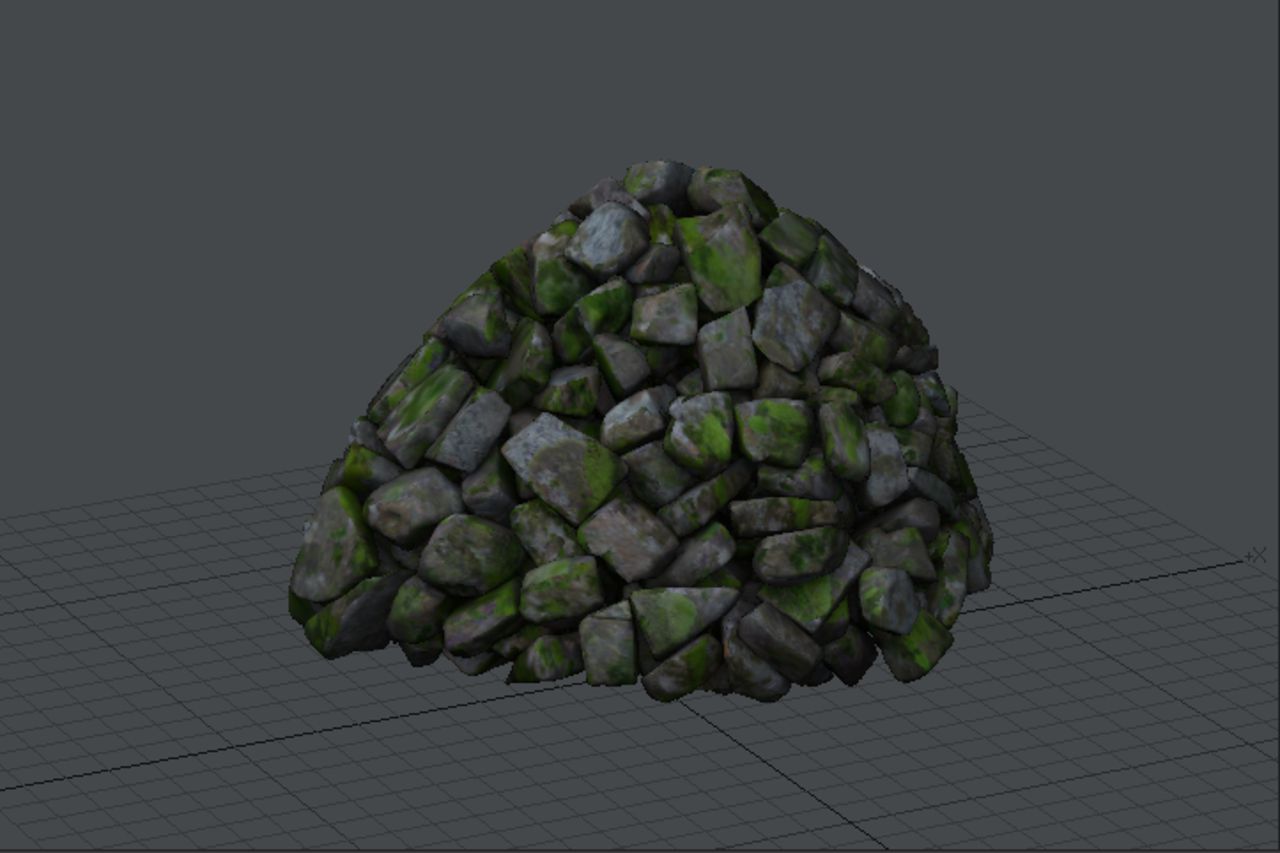
For the most part of March after the 19th, I tweaked more my learning and producing of animating the Walk and Run Cycle for bear and goat. During the end of march and april I started working on stone wall structures and its all screenshotted below. Having my editor inside Quest 2 is really now paying off, I can produce good looking graphics and merged/cloned objects really easy, so start nearing the actual game level designs but, there are still things to learn about Unity and Lightwave.
I have a couple of interresting screenshots of the procedure on how I created some Norwegian stone walls (steingĺrd/steingjerde) with moss on them. I even have an animation from inside the Quest 2 headset where I show how these things are created using 14 randomized rocks and letting gravity pile up things for me :-)
The next weeks ahead will be used to focus on improving probably the landscape, finalize some textures and objects, but most importantly I have to design my own trees and bushes, get them animated in the wind and set up a workflow to paint these onto the landscape using my own editor in Quest2, but also half of it will be done inside Unity.
Right now, we are already nearing a 4-month past producing of code, 3d-models, textures and features for both my editor but also for the actual VR Expierence/game called Episode 7 - Shelton's Kjort Endeavour. I might take a small break from Episode #7 and start producing Developer logs and articles for the other 9 episodes soon (which was already started several months ago), just to get going on several projects at once. My goal is to have something ready for Christmas 2022.
19 March 2022:
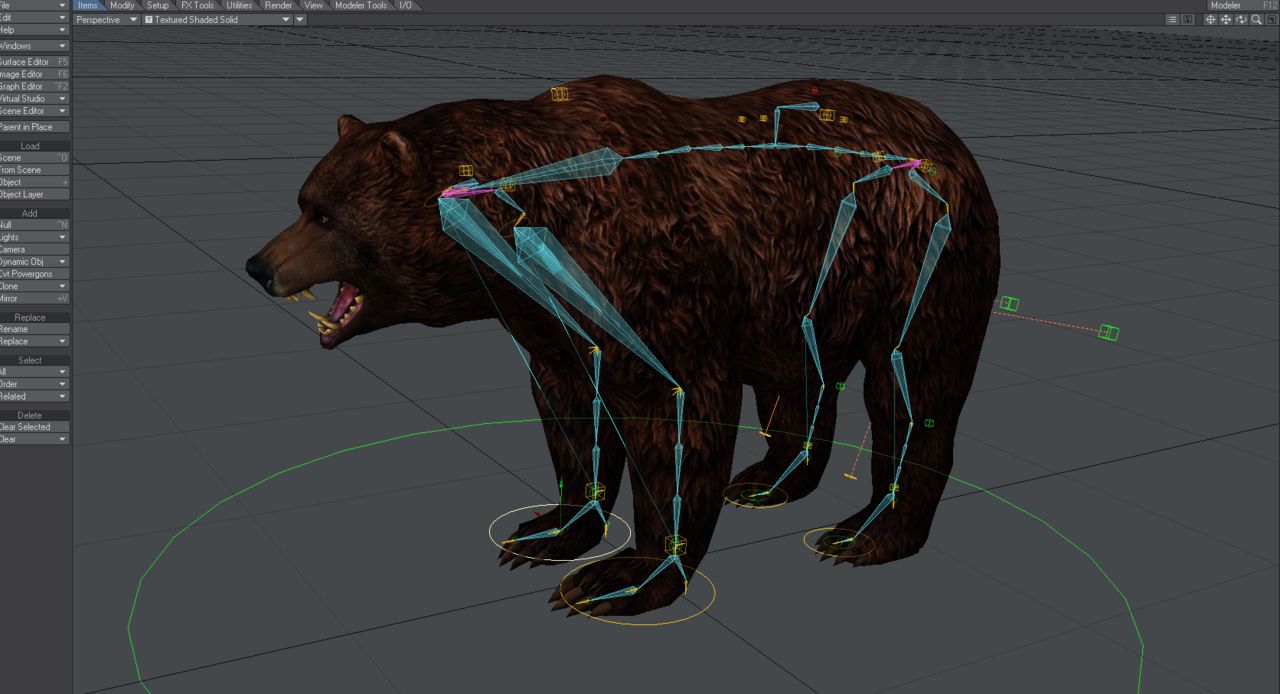
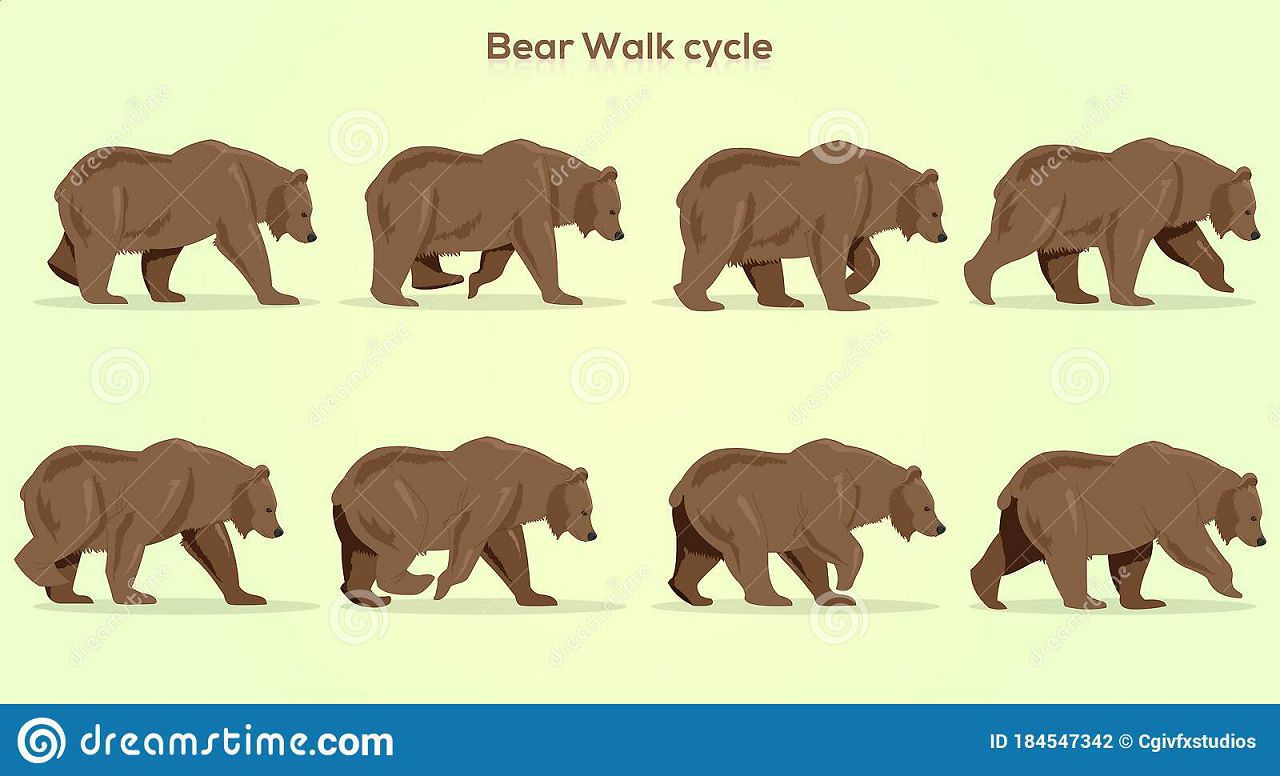
So, the past weeks were spent on investigating into 3d model animation, bones, rigging and Lightware Layout/Modeler and import into my Unity project. I have never animated an character in 3D ever, so its quite a lot to dig into to understand the rigging of an 3D object and all its behaviours. I started easily with Skelegons, then converted into bones and created some test animations, but after further research I just ended up into Lightwave's Genoma Rigging function which seems way faster, along with trying out "IK Booster". In my project I need the following motions to be applied to 3 different animals as well as an monster:01: Bear Walk Cycle
02: Bear Idle
03: Bear Turning
04: Bear Running Cycle
05: Bear Attacking
06: Eagle Glide
07: Eagle Wings Cycle
08: Eagle Attack
09: Goat Walk Cycle
10: Goat Idle Cycle
11: Goat Turning
12: Goat Running Cycle
13: Goat Attacking
14: Monster Walk Cycle
15: Monster Idle
16: Monster Turning
17: Monster Running Cycle
18: Monster Attacking
19: Monster Die
The animals in this VR Experience does not have any health bar or can be killed, but the Monster can be killed. The aim of this VR Experience is not however to kill them as they would simply respawn (based on its original origin which this VR Experience draws its inspiration from).
I still have some days and probably week(s) left before I can truly atleast produce some proper animations. I do need to learn and understand the basics of these things, as the bones, rigging and such will be used in my other 9 VR Experiences here and there. I do not intend to master it, but at least be able to produce anything but static moving objects at least :-)
I added just some small screenshots, as nothing is final yet regarding animation and rigging bones at this point.
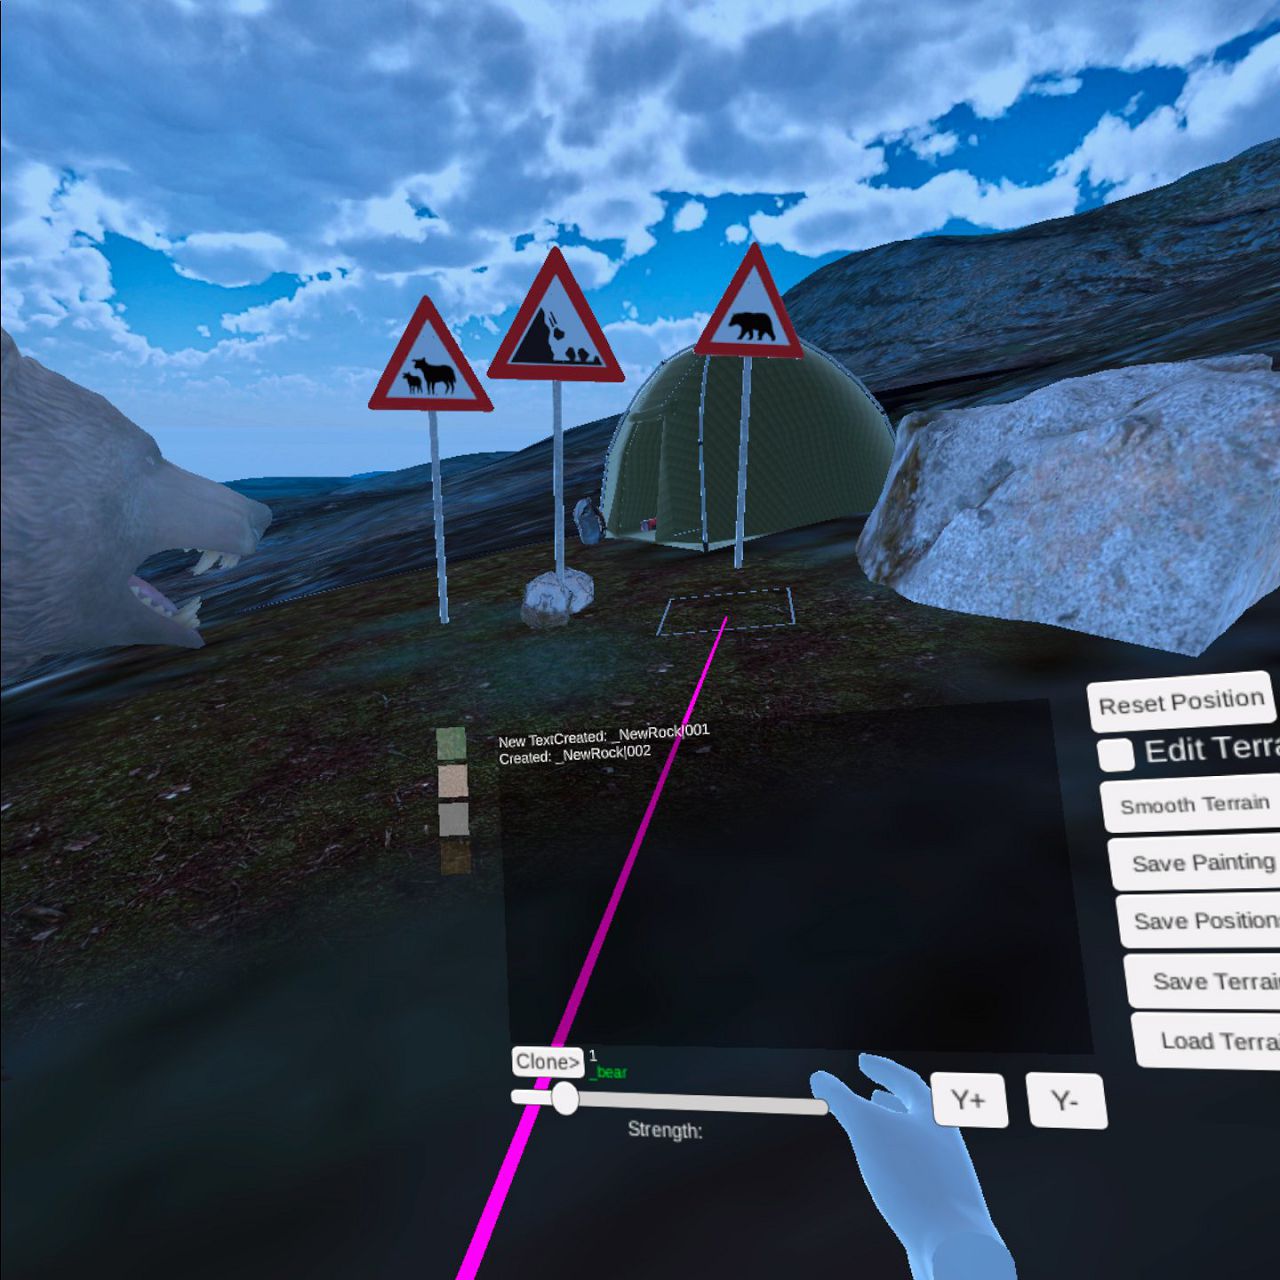
On a closing note for today, my VR based Terrain and Object Editor running inside Oculus Quest 2 was finalized and all functions planned works pretty good, I now have a easy editor for my VR Project "Moment in Time" :-)
03 Mar 2022:
Been struggeling with the Smoothing of Terrain feature, where the original one smoothed the entire landscape (super slow), so finalized the storage of last edited terrain points and used that selection to smooth out just that area. After it was done, the storage of terrain edited points where reset, ready for next smooth on a new area. This is finally working as intended.In addition, I had to improve my cloning function as it contained some severe bugs :-(. Now, that is working great too.
Next I need to add a function to scale either in width or height of an chosen object, currently it featured only 1:1 scale on all 3 axis, but I might have the need to scale an object wider or higher during game/experience editing. After that is implemented, I should start looking at finalizing some objects and finetune the textures to be as realistic as possible.
22 Feb 2022:
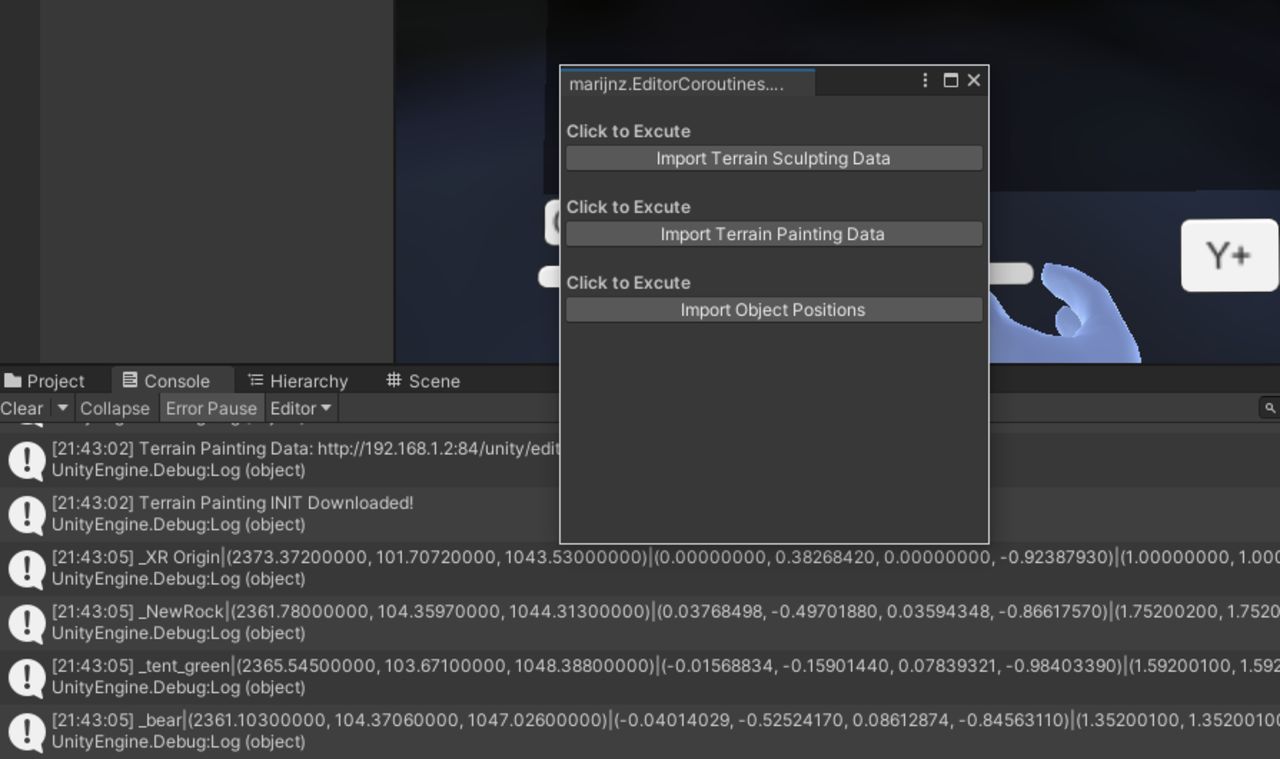
Finally managed to add final functions into my Terrain Editor (sculpt/paint), cloning of selected object and position/rotation/scale with all data uploaded to my local webserver straight from the Oculus Quest 2.In addition, I managed to also create my own scripts to re-import the data from my local webserver to fully re-position/scale/rotate objects in editing mode on Unity PC. This also now includes the successfull re-import of edited terrain data and painted texture layers. I could really see the benefit of beeing able to edit stuff inside the Quest 2 VR headset, export the data, and re-import into my Unity Project seamlessy. I added two more screenshots of both my editor and inside the VR editor.
Finally, i also started modelling and texturing some 3d objects needed for this experience which consisted of some standard Norwegian Traffic signs :-)
Next up the following days are to tweak a little bit on the sculpting terrain tool for my VR editor along with some other improvements on all the code that I have until now. There will also be more focus to model or find models suited to be used elsewhere in this VR experience. I have 4 animals that need to be animated too, which are Bear, Eagle, Mountain Goat and a mystery creature!
13 Feb 2022:
Managed to add a runtime functionality in my editor, where cloning of last grabbed gameobject into an empty container, with unique numbering of those objects so that if there was an object I want to place again, this is now possible. It was quite a struggle to get the name of the gameobject at first, but once that was done, the rest was just pure code and logic. Since my "Save Object Positions" function already was in place, I could now finally see all the postions of cloned objects from runtime mode inside Quest2 beeing uploaded to my local webserver.
Next up is to totally re-write how I am gonna get these positions (and newly created objects during runtime) to be recreated on the PC side of things inside the Unity Editor. It seems that terrain changes done in runtime, gets also saved once you exit play mode, but many other things does not stick in place :-(
I did have success before by modifying the YAML .unity file and replace the coordinates of recently moved objects, but now, since I also need to add objects that can only happen from within the Unity Editor itself. Naturally, I can load these things on realtime from my webserver, but I really want the changes to be presistent inside my saved project.
My plan is now to explore an nifty function of the editor, it turns out if you create an folder inside your project, called "Editor", any scripts there targetted for the Unity Editor menu, will actually appear as custom gui elements, and that means I can simply re-generate objects and their positions based on data read from my local webserver to recreate what was done inside the Quest2, thus allowing me to generate objects while not in play-mode to quite nicely get the newly cloned objects saved into my project. Thanks to Unity for letting that be an option for us alll.
11 Feb 2022:
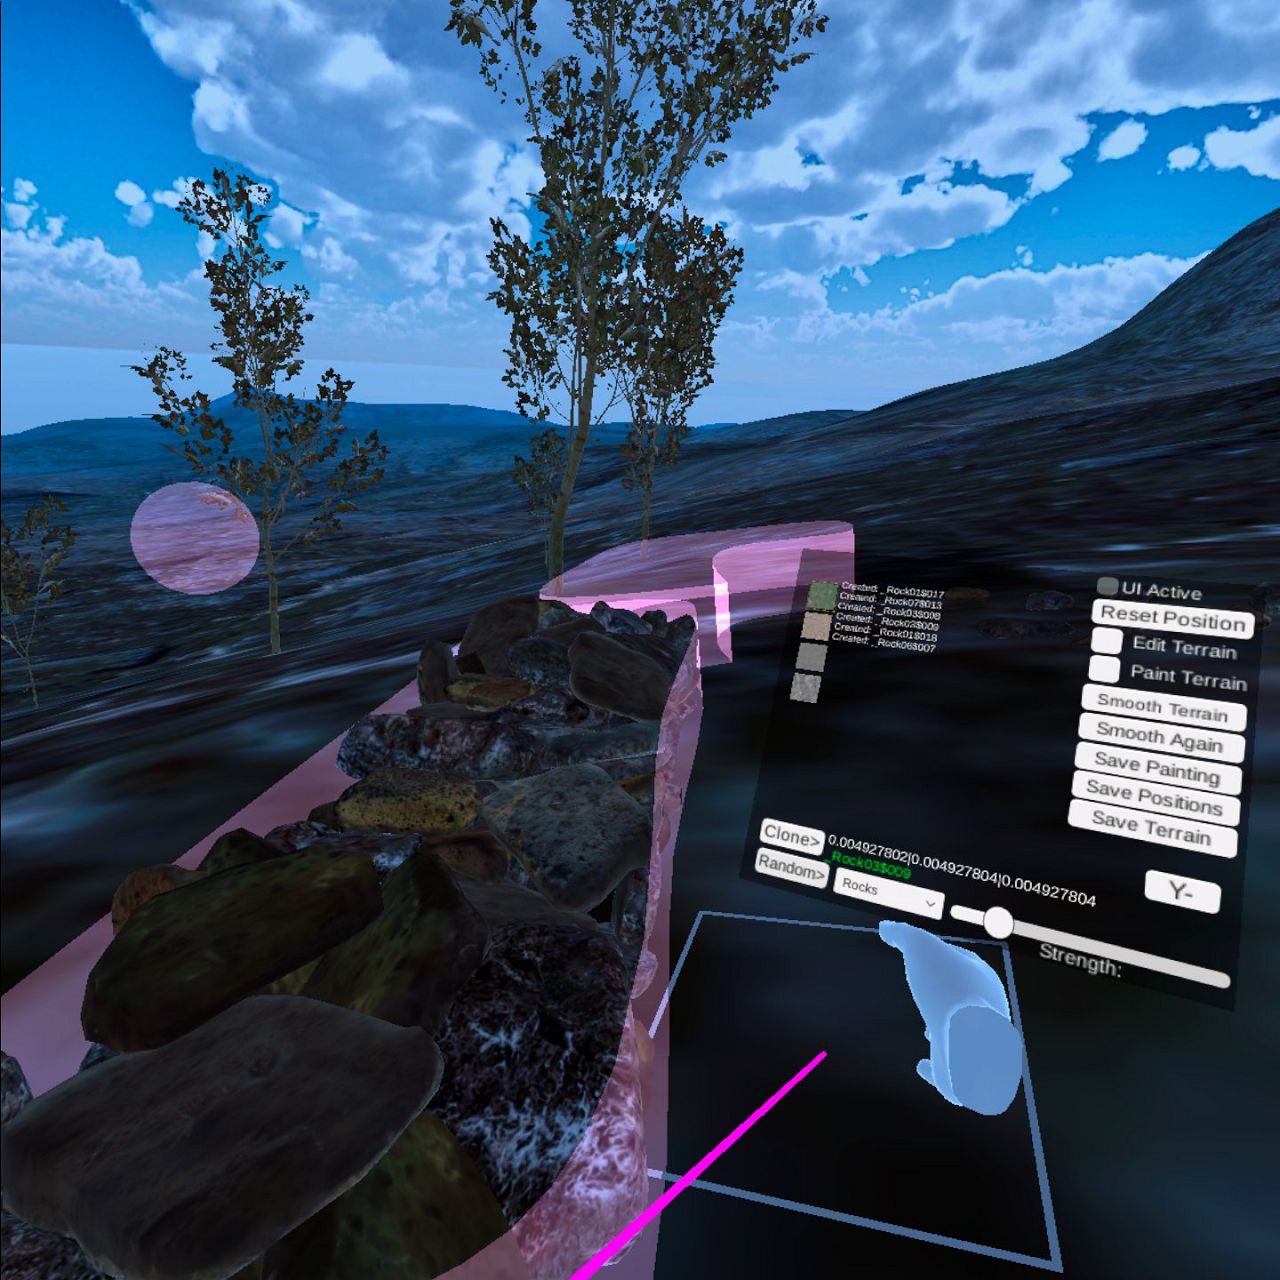
WOW! I had to really dig deep into the internet and C# code to achieve further progress on my own Terrain Modification and Painter tool inside Quest 2, but I have finally managed to get the grasp of it. I added a bunch of screenshots below. Currently I have completed more or less the following runtime in Quest2 features:
1: Hover square to where the painting of terrain goes with selected layer.
2: Automatic generation of Texture thumbnails on my debug panel.
3: Raise and Lower Terrain and store these changes internally.
4: Paint onto Terrain with selected texture
5: Store sculpting data onto Quest2 and the upload the changes to my webserver.
6: Store painting data (so called alphamaps or splatmaps) onto Quest2 during runtime.
7: Apply smoothing of painted area (in progress, currently smooths the entire Terrain, which is not the goal in the end).
Next steps are to finalize the optimized saving of only changes done to the Terrain (I previously had to save the entire terrain, 64mb or so, which was not really needed, but what I ended up during learning how to code in C# and Unity). After the terrain and painting operations was done, I will look into how to re-import these changes onto the Unity Editor on PC (already got it working for entire map, but now I have to adjust code for just changes only).
I must admit that my hours of working on this project is limited to only 3-4 hours at late night, as I do have my daytime job afterall. But, everyday a new problem gets solved bit by bit, if its learning Array's in C#, understanding the Unity commands, or understand the Terrain, layers, textures, gameobjects, detection of UI elements, raycasting or just simple things like saving files or loading them all takes its tiny amount of time. I can only rest assure that once my editor is created, I can make a prefab out of it and drop it into any other VR project I have planned, copy some scripts over, assign them, and really get productive for the other VR Experiences I have planned for "Moment In Time". It has been an amazing journey so far as beeing inside VR is a 30 year old dream that has finally happen. Every day I cherish Virtual Reality more and more and I am gonna let it totally consume me without any hesitation!
02 Feb 2022:
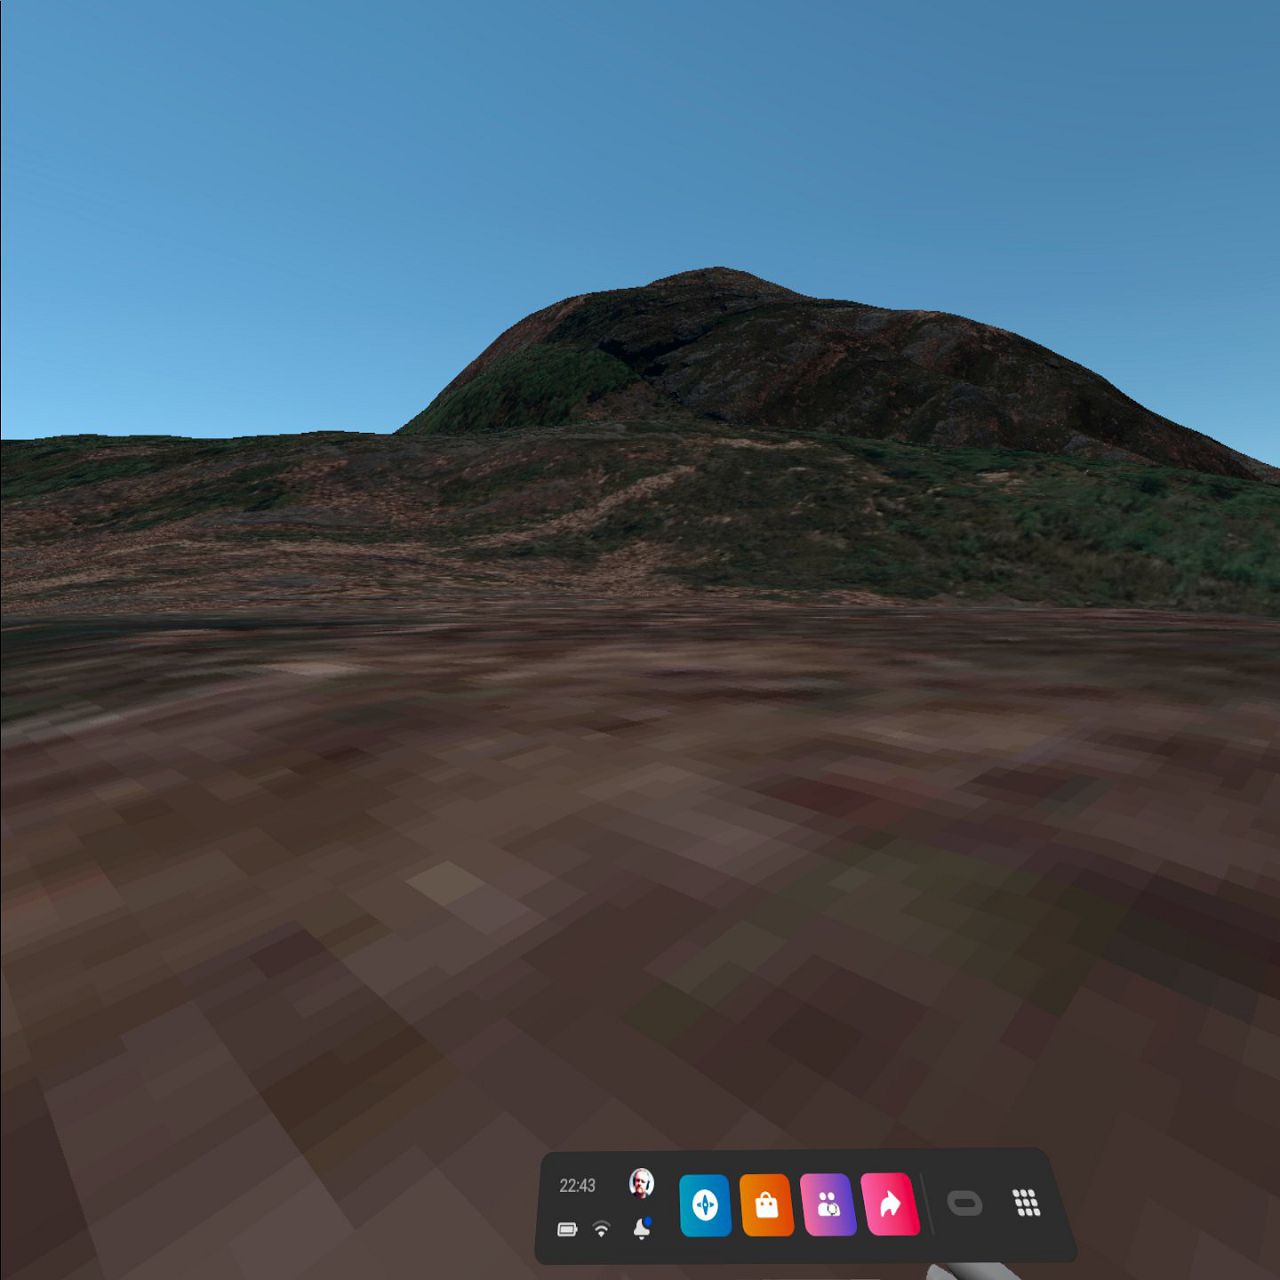
Finally managed to get terrain paint texture function during runtime/realtime within the Quest 2 headset. This is way more cooler and convenient to design the experience this way than on a 2D flat screen with a boring mouse and keyboard!
I added an animated gif below to show it in action, my hand wrist panel is quite "debug" state right now, but so far the saving and loading of terrain was a success, as well as storing positions of objects (that I can now place within the headset in runtime), along with crude working texture painting, phew!
Next up is to add possibly thumbnails of the texture or at least their names so I can select from available layers and material assigned to the Terrain during runtime. After that, I guess I have to start looking for a way to copy objects during runtime in order to start creating structures of rocks and other parts.
25 Jan 2022:
Managed to implement a crude way of saving the current edited terrain inside Quest 2 onto my php server, which I can then load back in Unity Editor on PC to check results. Further, I can also now load data from php server inside the Quest 2 and continue editing the landscape in VR. This is so cool on so many levels!
With Unity's Post, Put and Get WEB functions you can really work seamlessly more or less with the local PC editor.
I noticed also that there is an POST limit for UnityWebRequest.Post so I settled with 10MB chunks just to be safe, the current terrain binary formatted file was about 64mb. So, I had to split the files within Quest 2 by C# code, then send each over to my PHP server, and end with a merge php script to get all chunks back into a single file. It worked after some very stressfull "learning C and Unity" coding hours late into the night :-)
In fact, I should expand on this editor to support more functions as it would be my most important and favourite own created tool to further develop the planned 10 VR Experiences called "Moment In Time" pretty quickly but all done within the Quest 2 headset, it beats having to fiddle on a 1920x1080 PC screen with mouse and keyboard really!
23 Jan 2022:
Things are moving forward, but slower than expected, as I had quite a struggle to get Unity to bake the shadows and lights, so called Baked Lightmaps. For some reason, objects would not bake their shadows in, even if it showed in previews. Anyway, it seems by replacing some key files for lighting and render pipelines (due to my massive test & trial before this Episode 7), that seemed to fix it a couple of days ago. I also learned, studied, testing alot to make sure performance for the final VR Experience can be at least at 72FPS. I spent several days experimenting, reading and testing various things to see where the bottlenecks all where. I am far from done, but at least some understanding and progress have been made.
Further, I have been thinking about how to go about to design the landscape (Unity Terrain) and to my surprise there isn't a lot of folks thinking like I have for some months. My belief is that it is much easier to edit the level, modify terrain, add trees, grass and objects REALTIME inside Virtual Reality by the POV of the headset while you are Locomoting around, than doing the painfully editing inside Unity Editor using a PC using mouse and keyboard viewed as 2D. Editing these things on a flat screen on PC just does not give you the same expression that you may are looking for once playing it in 3D/VR inside the Oculus Headset!
So, after 1 day of googling and testing, I finally found a script that let you edit terrain by using Raycast information, problem was it was designed for PC use, hence MouseButtons, but I managed to add some code and replace 2 lines, and now I can just point my Oculus Touch controller, then using the XR RAY + LINE to modify the terrain where the red laser pointer goes, PERFECT!
This technique can then also be later used to paint textures, add grass and trees and such things. Another thing, which was already implemented by myself many months ago, was to be able to just drop a bunch of objects into the scene on PC, then once in VR, place these objects by using the Grab Interactable and place the objects by myself, in scale, inside VR and then save/upload the new positions back to my local webserver, which a selfmade tool would take the new x,y,z information and spit back into my .unity scene file!
That lets me design and place stuff where I want in Virtual Reality and moments later reimport the changes done directly into my PC project. This is really the way to do things, I am surprised the general community isn't talking too much about this really, because to me this is a game changer!
I mean, it should be default for any game designer that works for VR releases, do all the work inside VR (some folks are even coding inside, with multi-screens etc., but in theory the entire UNITY EDITOR should be a tool inside VR!
Yeah, you could always do Air-LINK of PC-LINK with the Oculus software, then get access to your local computer and develop this way, but I find the Air-Link to many times not start, and the PC-Link isn't always working at all, its all just random. Hitting play in UNITY will preview the scene at once inside the headset which is really nice, but I find it also too cumbersome to do actual editing and work this way. Its a good thing to do if you need to test parameters quickly instead of having to re-compile and deploy to headset, but for level editing, I would rather do the work inside the headset realtime, by POV and the Oculus Touch controllers and having some kind of panel attached to your left hand to select functions etc.
The next days I will try to improve the landscape resolution and start working on a functional wrist-panel to let me have more options for realtime terrain design, but I also need to figure out how to store the changes, most likely I have to copy the data out somehow through my local webserver, or save a file on Oculus Quest which I can copy back to my project on the PC side.
The script for modifying Unity Terrain realtime was found here
https://forum.unity.com/threads/simple-runtime-terrain-editor.502650/
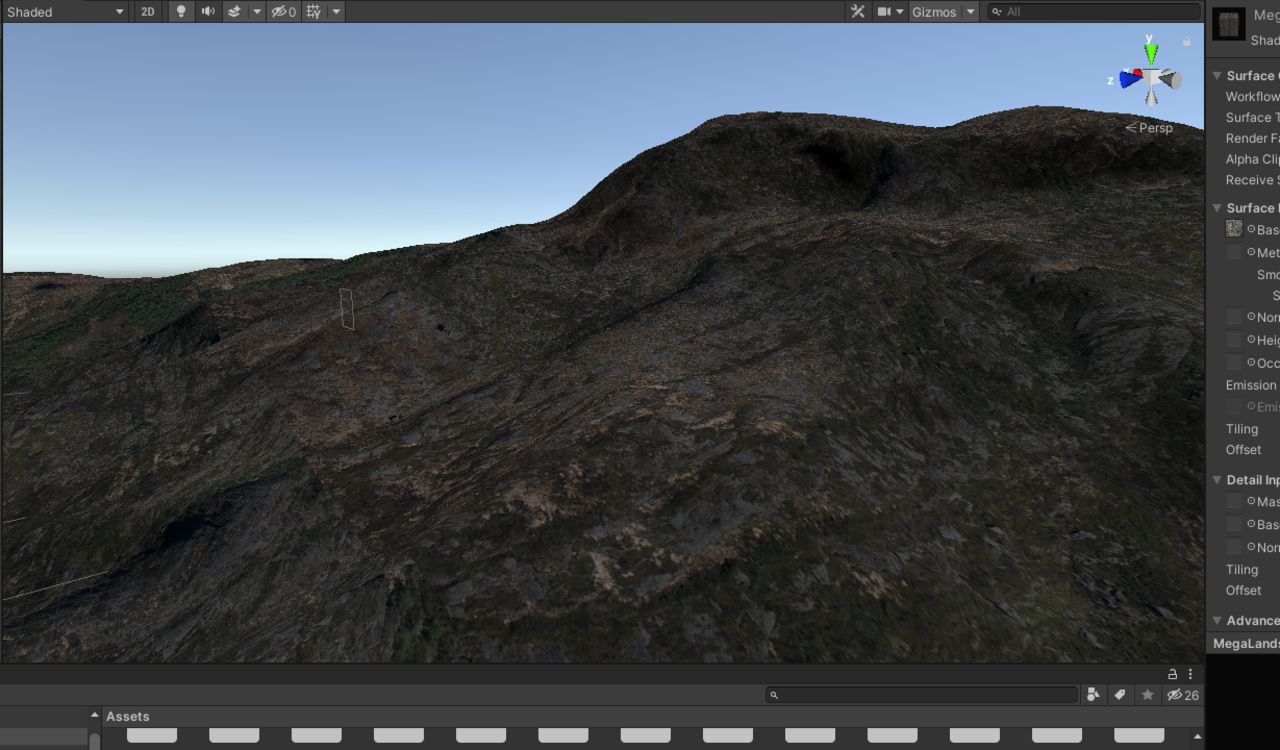
And, oh, I also added a new picture dated 23 Jan 2022 below, this is the current coloring and some playing around with terrain layers experimentation of the fog and first layer of global terrain texture, lights, skybox with lame medicore photo from an Unity asset used for now (I need to add my own photographed skybox photos as I see a lot of crap material available in the Asset store, sorry to say).
13 Jan 2022: Finalizing the mountain 3D model
I ended up using the QGIS and DEMto3D approach and created an insane detailed mesh export of the mountain landscape, converted to LWO object (Lightwave). The LWO file ended up with 1.0 million polygons and a filesize of 26mb, 1:1 scale, not bad!
I exported that to FBX format and imported into Unity. Now, the problem came as I can not use Terrain Tools on that model. Luckily some smart guy had created an Youtube tutorial https://www.youtube.com/watch?v=yVwt33sSUyQ which let me convert my model into a real Terrain object for using further. All of that was an success and the entire model played fine inside Oculus Quest 2, phew!!!
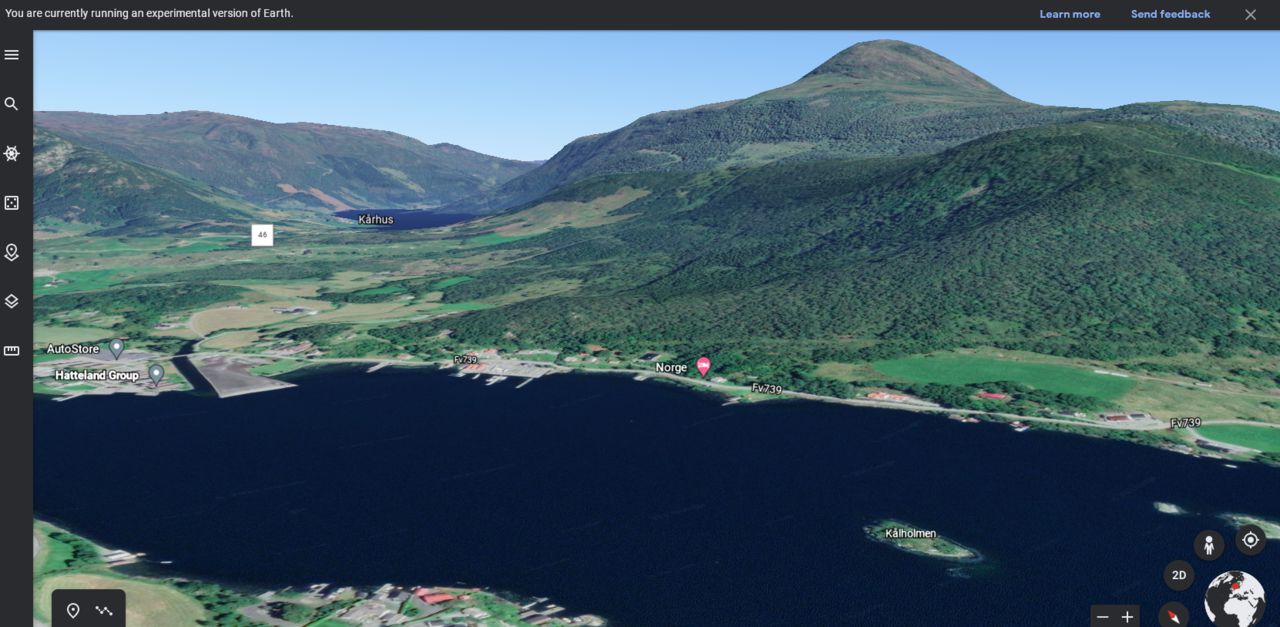
I then googled around to find high resolution photo of the mountain (plane and satellite) to be used as ground base texture for the entire landscape model, and ended up having to chop it into sections as I zoomed as far as possible in to get the most details. A total of 20 images resulting in an temporary texture size of 8408 x 3611 pixels or so.
10-12 Jan 2022: Preparing the mountain base
As this Episode deals with an big mountain I had to investigate how to deal with creating a landscape from a grayscale elevation map or convert it into a 3d-model with some fancy tricks in order to start with the "base" of this Episode. I expect 3-4 days to finalize this part of the project.
In fact, within the SOMIT project, 6-7 other episodes will benefit and feature the same mountain area, but designed differently to fit the other VR Experiences located elsewhere within the cut-out landscape. I figured that if I work really hard and precise on the mountain terrain base and its textures, trees, rocks and roads and I cut development time and production as I would have my own personal 3D photorealistic landscape that can be reused :-)
There are several ways:
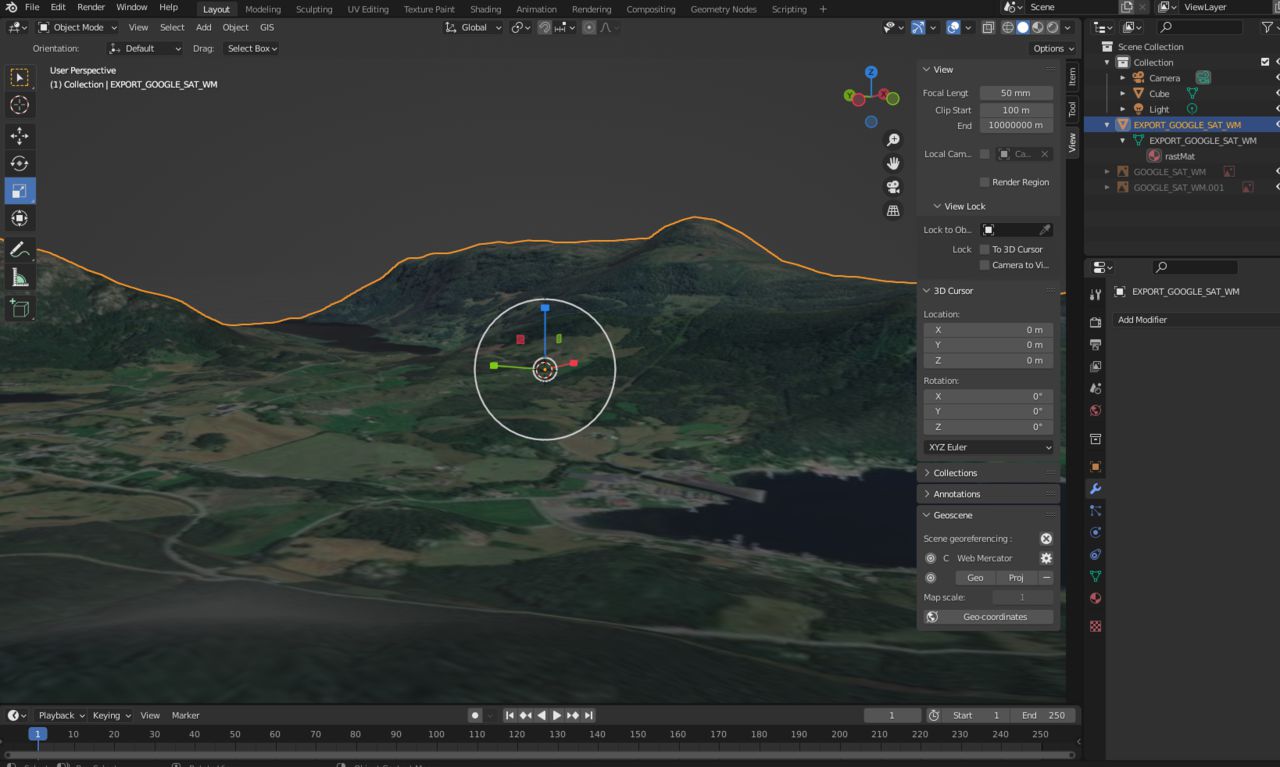
1: By using BlenderGIS with Blender to capture map and elevation data from Google Maps.
= Result: Allthough it actually went okey, something's is off when exporting out the 3D model, it was just blank and no error messages occured, no matter what, the entire model has some data, but nothing never shows. It does not matter, as I don't use Blender, nor do I really like Blender (too many icons and VERY cumbersome non-standard way of navigating around the scene with mouse). It's also filled with TOO MUCH buttons and menus (typical result of what happens when Open Source become infected with 10000 people with 10000 ideas). Sorry, this software does not cut it for me this time, maybe another time.
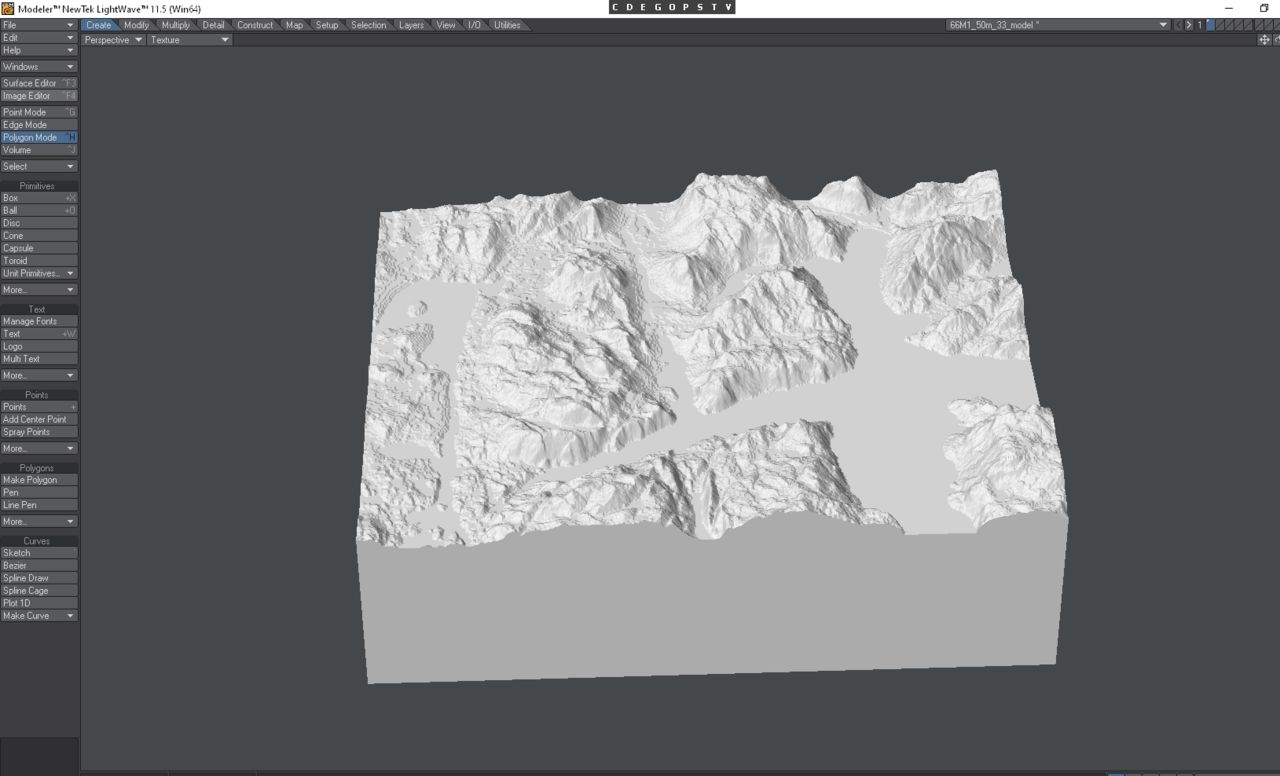
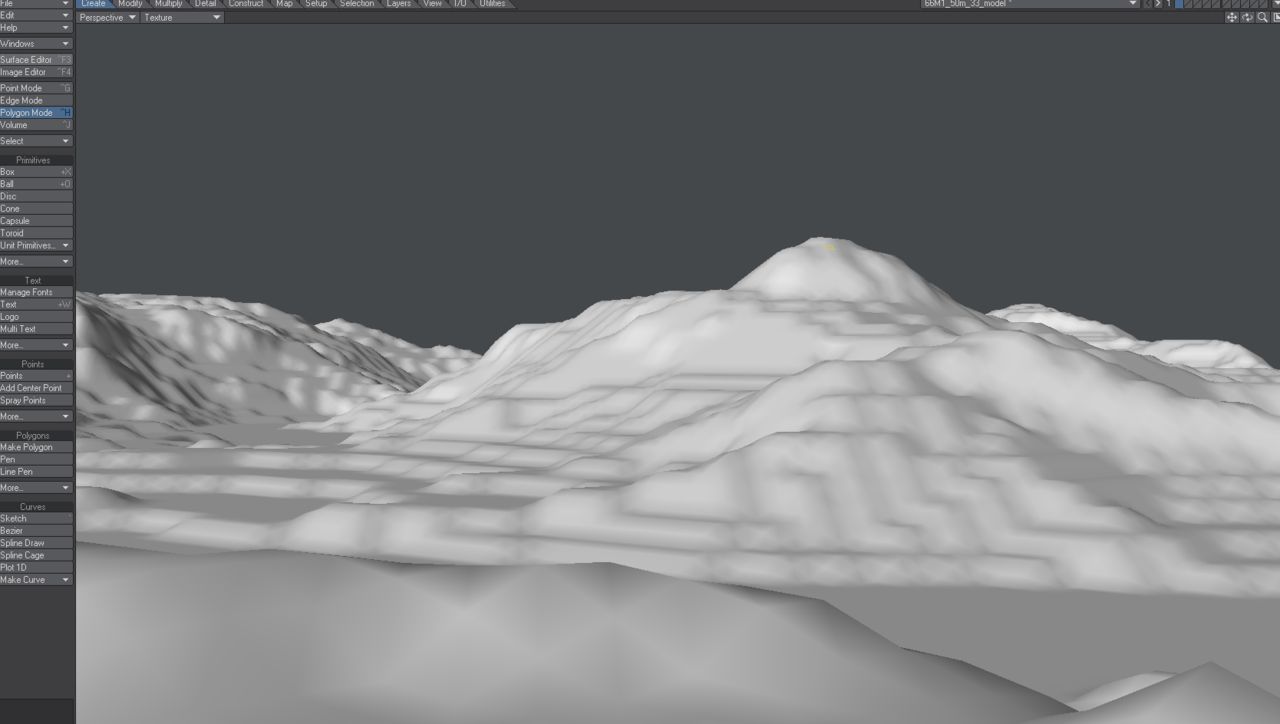
2: By using real DEM (digital elevation models) data files from a Norwegian site to capture a local area where I live that happens to have the exact perfect mountain top I need for this experience. The mountain is called "Kjort" and is about 606 meters high.
= Success: I went to "https://www.geonorge.no" and found some DEM files, downloaded one called "66M1_50m_33.dem". Then, by using a free software called "QGIS" from "https://qgis.org". So far, so good. Next was to find a plugin called "DEMto3D" which is intentionally created for the purpose of 3D printing. Well, installed that plugin, and adjusted some paramteters into fine high overkill details and exports to a VERY large .STL file. Took forever :-)
From there, I converted the .STL file with "AccuTrans3D" software from "http://www.micromouse.ca" into a Newtek Lightwave Modeler (.lwo) 3D object, so that I can work with it further. Newtek Lightwave and Modeler I have used since the early 90's on Amiga 500!
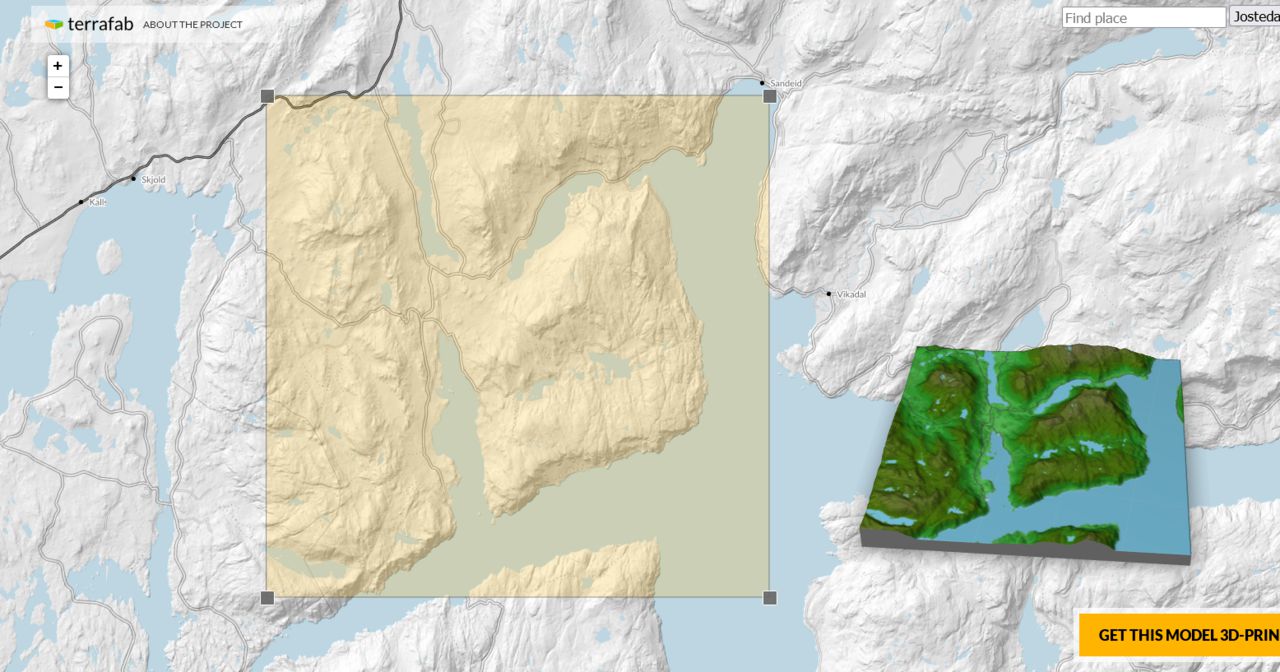
3: By going to a site called "Terrafab", "http://terrafab.bengler.no". which has a nice service to select part of Norway, then order a 3D printed version of that. Luckily, they also had a "Download Model", which of course did not WORK! Stupid crap and utterly useless for my purpose, so there! The error in browser debug said "500
Internal Server Error", so whatever.
Next after the 3D model is fine and dandy, I will find the best plane or satellite photos of the same area and use these as standard textures, but also create Normal maps to get that "bump" effect added inside Unity to bring up the quality and realism even further. That should cover the base texture and elevated physical details. I do plan to use the DEM 3D model exported landscape as 1:1 in the final VR experience too.